7.9 KiB
A slow tour through Mu software on x86 computers
Mu shrinks all the software in a computer until it can (in principle) fit in a single head. Sensible error messages with as little code as possible, starting all the way from your (x86) processor's instruction set. Everything easy to change to your needs (habitable), everything easy to check up on (auditable).
This page is a guided tour through Mu's Readme and reference documentation. We'll start out really slow and gradually accelerate as we build up skills. By the end of it all, I hope you'll be able to program your processor to run some small graphical programs. The programs will only use a small subset of your computer's capabilities; there's still a lot I don't know and therefore cannot teach. However, the programs will run on a real processor without needing any other intermediary software.
Prerequisites
You will need:
- A computer with an x86 processor running Linux. We're going to slowly escape Linux, but we'll need it at the start. Mu works on other platforms, but be warned that things will be much (~20x) slower.
- Some fluency in typing commands at the terminal and interpreting their output.
- Fluency with some text editor. Things like undo, copying and pasting text, and saving work in files. A little experience programming in some language is also handy.
- Git for version control.
- QEMU for emulating a processor without Linux.
- Basic knowledge of number bases, and the difference between decimal and hexadecimal numbers.
If you have trouble with any of this, I'm always nearby and available to answer questions. The prerequisites are just things I haven't figured out how to explain yet. In particular, I want this page to be accessible to people who are in the process of learning programming, but I'm sure it isn't good enough yet for that. Ask me questions and help me improve it.
Task 1: getting started
Open a terminal and run the following commands to prepare Mu on your computer:
git clone https://github.com/akkartik/mu
cd mu
Run a small program to start:
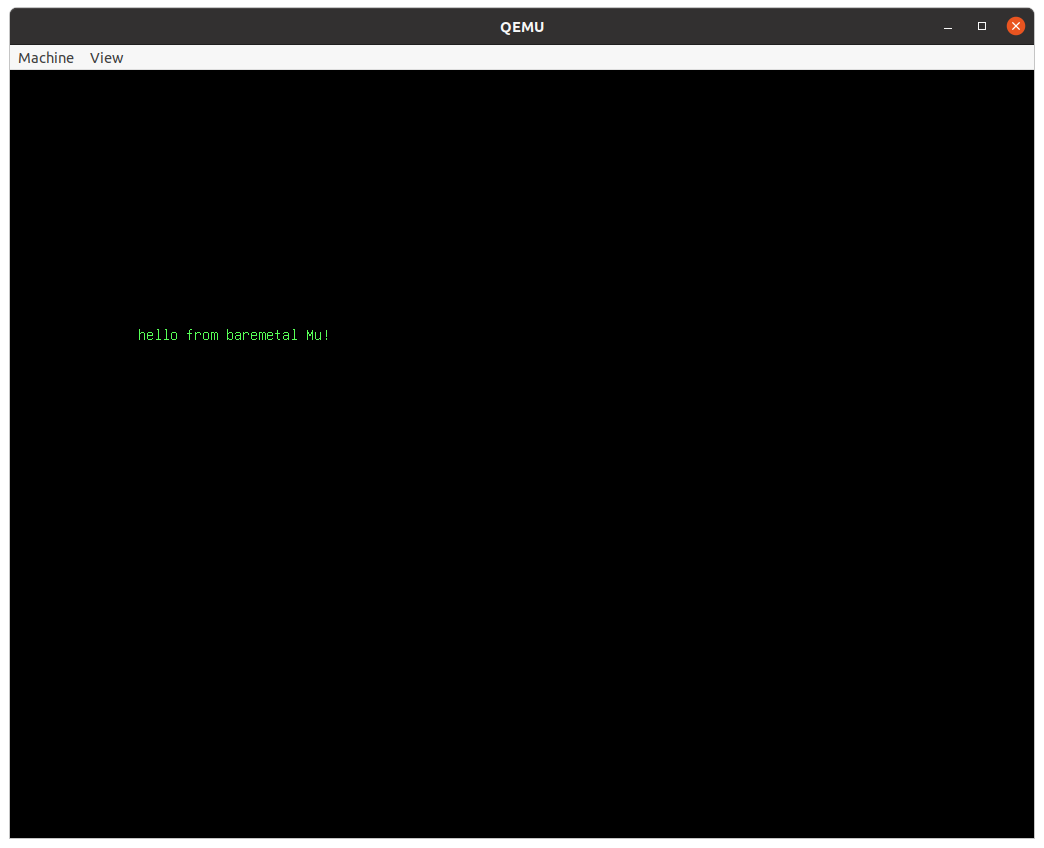
./translate apps/ex5.mu
qemu-system-i386 code.img
If you aren't on Linux, the command for creating code.img will be slightly
different:
./translate_emulated apps/ex5.mu
qemu-system-i386 code.img
Either way, you should see this:
If you have any trouble at this point, don't waste any time thinking about it. Just get in touch.
(You can look at apps/ex5.mu at this point if you like. It's just a few
lines long. But don't worry if it doesn't make much sense.)
Task 2: running tests
Here's a new program to run:
./translate tutorial/task2.mu
qemu-system-i386 code.img
(As before, I'll leave you to substitute translate with translate_emulated
if you're not on Linux.)
This time the screen will look like this:
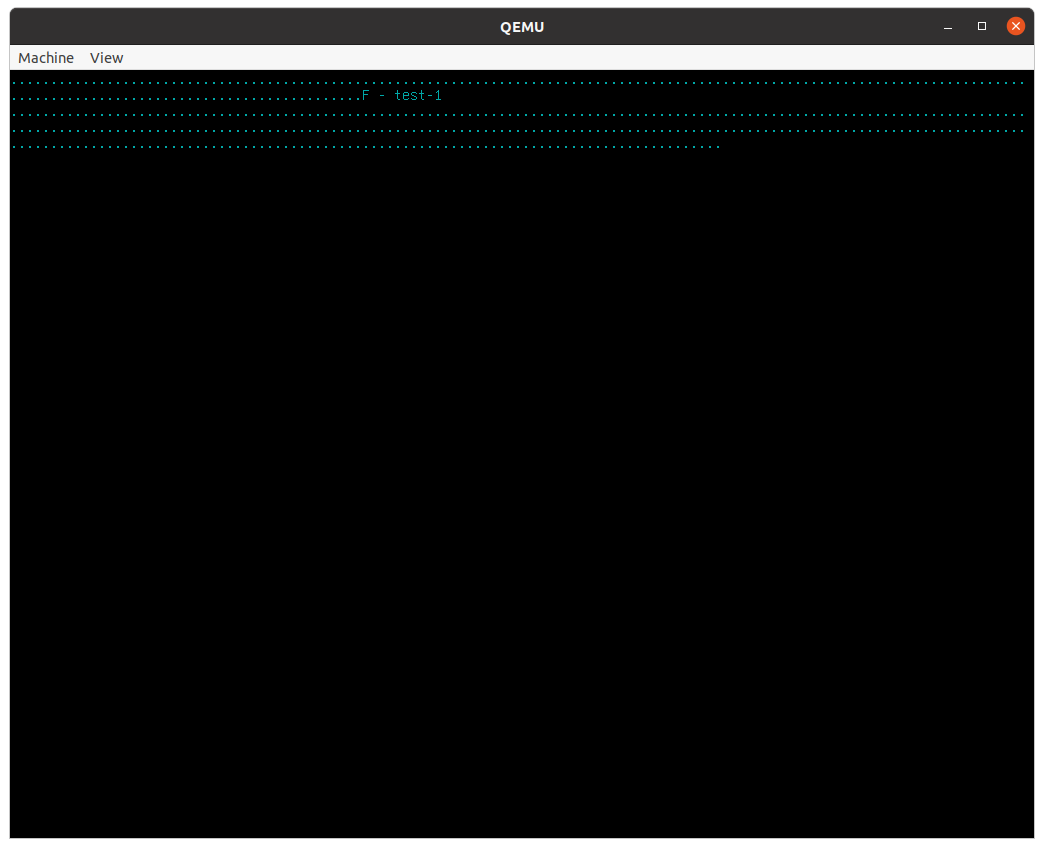
Each of the dots is a test, a little self-contained and automated program run with an expected result. Mu comes with a lot of tests, and it always runs all tests before it runs any program. You may have missed the dots when you ran Task 1 because there were no failures. They were printed on the screen and then immediately erased. In Task 2, however, we've deliberately included a failing test. When any tests fail, Mu will immediately stop, showing you messages from failing tests and implicitly asking you to first fix them.
(Don't worry just yet about what the message in the middle of all the dots means.)
Task 3: configure your text editor
So far we haven't used a text editor yet, but we will now be starting to do
so. Before we do, it's worth spending a little bit of time setting your
preferred editor up to be a little more ergonomic. Mu comes with syntax
highlighting settings for a few common text editors in the editor/
sub-directory. If you don't see your text editor there, or if you don't know
what to do with those files, get in touch!
Here's what my editor (Vim) looks like with these settings on the program of
Task 1:
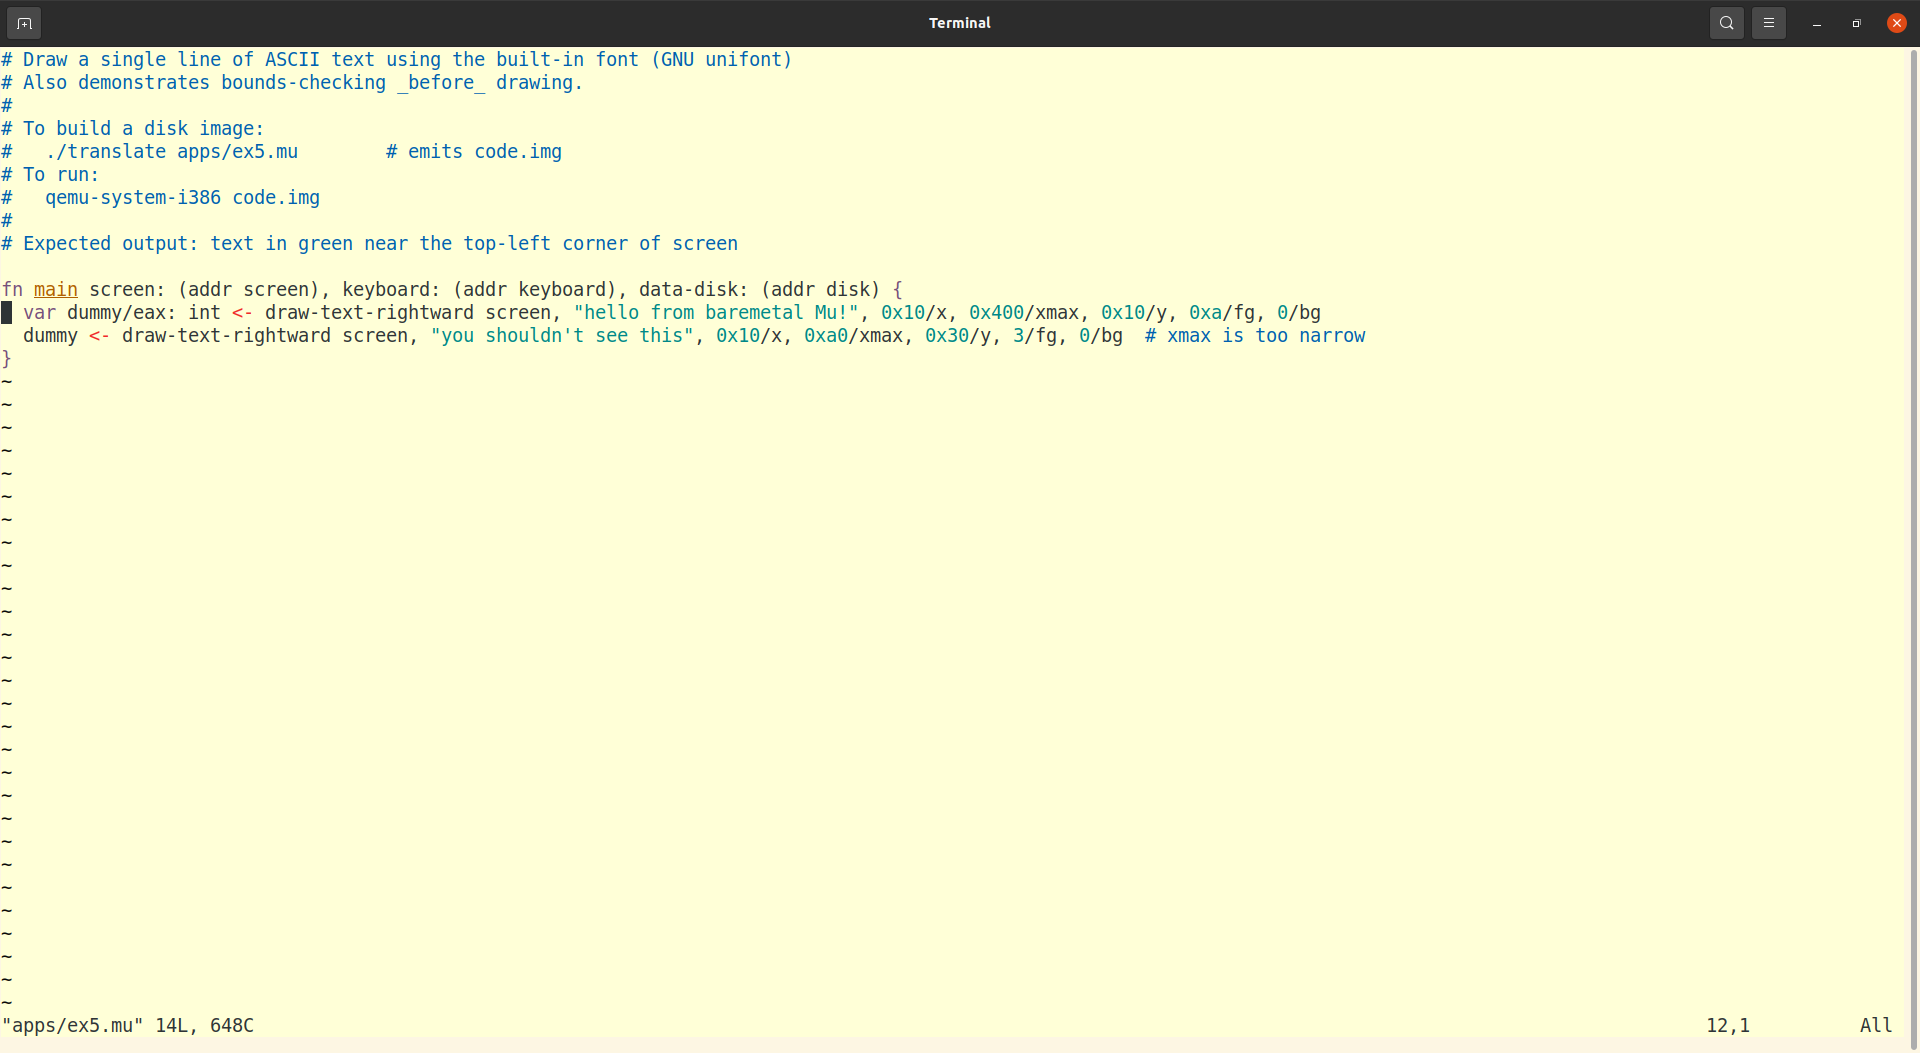
It's particularly useful to highlight comments which the computer ignores
(everything on a line after a # character) and strings within "" double
quotes.
Task 4: your first Mu statement
Mu is a statement-oriented language. Read the first section of the Mu syntax description to learn a little bit about it.
Here's a skeleton of a Mu function that's missing a single statement.
fn the-answer -> _/eax: int {
  var result/eax: int <- copy 0
  # insert your statement below {

  # }
  return result
}
Try running it now:
./translate tutorial/task4.mu
qemu-system-i386 code.img
(As before, I'll leave you to substitute translate with translate_emulated
if you're not on Linux.)
You should see a failing test that looks something like this:

Open tutorial/task4.mu in your text editor. Think about how to add a line
between the {} lines to make the-answer return 42. Rerun the above
commands. You'll know you got it right when all the tests pass, i.e. when the
rows of dots and text above are replaced by an empty screen.
Don't be afraid to run the above commands over and over again as you try out different solutions. Here's a way to run them together so they're easy to repeat.
./translate tutorial/task4.mu && qemu-system-i386 code.img
In programming there is no penalty for making mistakes, and once you arrive at the correct solution you have it forever. As always, feel free to ping me and ask questions or share your experience.
Mu statements can have outputs on the left (before the <-) and inouts
(either inputs or outputs) on the right, after the instruction name. The order
matters.
One gotcha to keep in mind is that numbers in Mu must always be in hexadecimal
notation, starting with 0x. Use a calculator on your computer or phone to
convert 42 to hexadecimal, or this page on your web browser.
Task 5: variables in registers, variables in memory
We'll now practice managing one variable in a register (like last time) and a second one in memory. To prepare for this, reread the first section of the Mu syntax description, and then its section on local variables. The section on integer primitives also provides a useful cheatsheet of the different forms of instructions you will need.
fn foo -> _/eax: int {
  var x: int
  # statement 1: store 3 in x
  # statement 2: define a new variable 'y' in register eax and store 4 in it
  # statement 3: add y to x, storing the result in x
  return x
}
Again, you're encouraged to repeatedly try out your programs by running this command as often as you like:
./translate tutorial/task5.mu && qemu-system-i386 code.img
The section on integer primitives shows that Mu consistently follows a few rules:
- Instructions that write to a register always have an output before the
<-. - Instructions that use an argument in memory always have it as the first inout.
- Instructions that write to memory have a preposition in their name. Contrast
addto a register vsadd-toa memory location,subtractfrom a register vssubtract-froma memory location, and so on.